Posts

Showing posts from 2015

菜鸟修炉子

Image
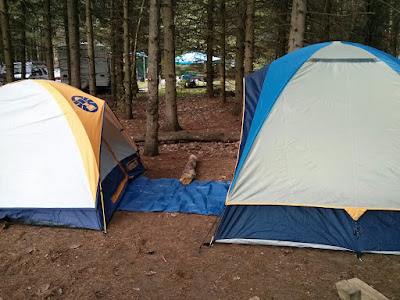
我家的炉子是在Sears买的 Kenmore, 才用了7年,后面2个小炉头相继歇菜,点不着了。 今天打算买新炉子,网上一看,最便宜的$1200左右,是不是啊?!老爸的名言一下子在脑海里蹦了出来,“事情都是人做的,人家能做,你也能做,用自己的头想一想。” 妈妈叫上爸爸,一起来修! 看,后面2个小圈罢工了。 断电。打开烤箱门,炉沿下方有2颗螺丝跟烤箱生在一起的,拆掉一拉,翻起来。内幕如图。 工作的大炉子是这样接线的 罢工的小炉子是这样接线的。插上电源,爸爸用试电笔一检查,2个小炉子都有电,线路没问题。那就是开关使坏了!拆后盖。 后盖上附有详细的电路图。妈妈物理很差的!爸爸没有耐心看。我们还是看实物吧! 原来是控制器坏了!2个控制器,白色的塑料都烧黑了,还有黑色粉末掉下来。换个这零件应该就可以工作了,抄代码。 空间很小,用镜子照个反相,再用镜子看正面。镜子真是个好东西! 妈妈一边抄代码,一边自言自语,“这控制器是不是有问题啊?怎么2个都能烧坏了?再买2个来是不是同样下场啊?。。。” 爸爸一边给炉子还原,一边发表意见,“就是!这种2个都坏的情况,我们那 fault tolerance都不能 handle! Design defects!" 哈哈哈。。。fault tolerance, 做 carrier grade telecom的朋友们都懂的。 爸爸妈妈花了一个钟头,手脑并用,到炉子里兜了一圈。最后结论,买新炉子! 有始有终!坏了的零件是这个,叫做burner switch, 加元$32加税一个。本来想换开关的,爸爸说“你换了这2个,那2个很快也要换!” 冥冥中妈妈觉得乌鸦嘴说的会兑现。算了,买新的!

2015 圣诞假期

Image
2015年的圣诞假期,我们一家三代第一次去坐了游轮,然后在阳光明媚,椰树摇曳的弗罗里达度假屋住了一周。美好的时光,留在记忆里,Blog上。 旱鸭子坐船记   Everglades国家湿地公园一日游 Florida Keys

Bi-fold paper picture frame

Image
One mom's way to hold memories ... Every year, kids brought home the school pictures, some are really bad, some are awesome! No matter what, the pictures record their growth in that year, which means a lot to mom. ;) I like to make this bi-fold paper picture frame to save their yearly school pictures. They make wonderful gifts for the grandparents, and good for me to see their changes year after year.  Materials: Plain bi-fold greeting card from your craft store, 5 x 6.5 in Scrapbook cardstock paper, plain or printed Ruler X-acto knife Cutting mat Pencil Double sided tape 3 x 5 pictures, 2 Instructions: Make mats:  Cut 2 rectangles from the scrapbook paper, 4.5 x 6 in; Measure 5/8 inches from all sides, draw and cut the inner rectangles; repeat for another; Measure and cut 1 strip of tape for the short side of the mat, and 2 strips of tape for the long side; cut each strip into 2 long strips. We want to leave some room around the inner ma

Banana Cranberry Muffins

Image
Easy to make cranberry banana muffins Ingredients: 1 1/4 cup flour 1 cup oats 1/2 cup sugar 1 1/2 tsp baking power 1 tsp baking soda 1/2 tsp salt 1 egg 3 large banana, mashed 1/4 cup butter, melted 1 cup cranberry, fresh or frozen Directions: Preheat oven at 350 F degree; Mix the dry ingredients in a large bowl; Beat egg, banana, and butter in a small bowl; add to the large bowl, stir to blend;  Stir in the cranberries;  Put 12 liners into 1 muffin pan, use an ice cream scoop to drop the batter to pan; Bake for 22 minutes, makes 12 muffins.

Roasted Chestnut

Image
A perfect snack for the cold winter night ...  Wash chestnuts thoroughly, air dry; Preheat oven to 400 F degree; With a sharp knife, make a cut on each chestnut; Coat the chestnuts with cooking oil, lay them in a single layer on a large baking sheet; bake for 25 - 30 minutes; Dissolve sugar in boiling water, brush it onto the chestnuts, especially the cut opening; bake another 10-15 minutes; Cool, server warm. Baking time various depending on the size of the chestnuts, adjust accordingly.

Rice Crispy Squares

Image
        Kids' Favorite Rice Crispy Mini-squares I found the original rice crispy bars are too sweet for my family, and luckily there is a recipe provided inside every rice crispy cereal box. I tested several times, and here we go, a home-made less sweet, more crispy rice crispy bar. INGREDIENTS: 1/4 cup butter 250g marshmallow 1/2 tsp vanilla 8 cup rice crispy cereal DIRECTIONS: Heat a large non-stick pan on low heat; melt butter, add marshmallows, stir to melt; add vanilla; Remove pan from heat, add rice crispy cereal, stir to coat evenly; Lightly press the rice crispy into a 13x9 non-stick pan; cover with a tea towel until cool completely; Loose the edges and turn it onto a cutting board; cut into squares of your size choice. Makes 48 bite size mini squares. Note: 5 cups of original plain + 3 cups of Christmas colored = 8 cups of rice crispy cereal used Just enough food coloring to cheer them up. ;)

Yoga Mat Bag

Image
A personal yoga mat bag only needs a little fabric and an hour of sewing.  I added 2 patch pockets to hold my keys and smartphone, and a long strip so I can carry it cross my body, hands-free. MATERIALS: a large rectangular bag body two circle plus interfacing for the bottom a long rectangular strip for the carrying strip a small rectangular strip for the top opening a small long strip for the drawstring decorative band on carrying strip and pocket (optional) INSTRUCTIONS: Measure your mat, cut the above pieces; I saved a gift wrapping band earlier, here I cut and sewed them on to the pocket piece and carrying strip piece to give it a character;  Add the interfacing to one circle fabric according to manufacture's instruction; Right side together, sew the long side of the carrying piece together; turn right side out, iron press;  Attach the pocket piece to the body piece; right side together, sew the long side of the body piece together; finish the raw ed

Baked Salmon

Image
Asian style baked salmon fillet INGREDIENTS: 1 kg fresh salmon fillet 6 clove of garlic, minced 1/2 cup soy sauce 1/2 cup brown sugar 1/4 cup vegetable oil DIRECTIONS: Season fish with salt and black pepper to taste; Put minced garlic, soy sauce, vegetable oil, and brown sugar in a bowl, mix well; Pour sauce into a large ziploc bag, put in fish fillets, zip to seal, turn to coat well; lay the bag flat in the refrigerator for 30 min, turn at half time; Preheat oven to 425 F; Wrap each fish fillet in a foil pouch, seal and leave some air in; Put the foil pouches in a large baking sheet, bake 15 min; When done, pour the remaining juice in each foil pouch on the fish fillet, sprinkle with green onion; serve hot.

胡萝卜炖羊肉

Image
秋凉的时候炖锅羊肉,滋补暖身。 1. 羊肉切块,在冷水中浸泡一小时,中间换水; 2. 准备调料,葱姜蒜切粒, 干辣椒,孜然; 3. 胡萝卜滚刀切块; 4. 热锅加少许油,下羊肉块,炒干水汽,盛出; 5. 起油锅,葱姜蒜炒香,下羊肉块,翻炒至肉发白; 6. 加入酒、干辣椒、孜然、生抽、老抽、盐、糖翻炒拌匀; 7. 放入高压锅,加开水漫过羊肉;倒入胡萝卜; 8. 开炖肉档,35分钟。 好吃得做梦都能闻到香。。。

Crazy about buttons 2

Image
Another simple project with buttons, just keep sewing them on ... ... ;) These cushions are from Chapters, cotton/linen cover with hidden zippers, feather fill inside. Buttons come in a bulk bag from Walmart.  Trace a simple pattern with calk, unzip the cover, and start sewing. Have fun playing with different colors, shapes, and sizes!  

Egg in a basket

Image
Bread and egg married happily ever after ;) A simple and easy breakfast item. Lightly grease a ramekin with cooking oil; Roll a piece of bread thin; line the ramekin with bread, fold at the 2 square corners and the middle of the top; Add one whole egg; Bake at 400 F for 15 minutes; Season with salt and pepper to taste.

盐焗烤鸡翅

Image
材料: 料酒 麻油 辣椒油 花椒 盐焗鸡粉 步骤: 1公斤鸡翅洗净; 加料酒、麻油、辣椒油拌匀; 加花椒和盐焗鸡粉拌匀; 放冰箱冷藏2小时或者过夜; 烤箱预热到380华氏度,烤盘刷油,皮朝下摆好鸡翅,进烤箱烤25分钟,翻面再烤15分钟;如果喜欢焦一点,关火5分钟后再拿出盛盘; 放户外烧烤炉上效果更佳。 自从认识了盐焗鸡粉,烤鸡翅就变成了一件不用记忆也能回回复制的美味,孩子尤其爱吃。

银耳汤

Image
我从小爱喝银耳汤,喜欢它清亮的样子、滑腻的口感。据说清热。;) 35克 银耳 半把 枸杞 半把 莲子 适量冰糖 银耳用凉水泡发,全部舒展开后去蒂、分小、洗净; 莲子去心,和枸杞一起洗净; 全部放进 instant pot,加凉水至10杯刻度,开到soup档,45分钟,自然降压。 简单又美味的食物!

茄汁牛尾

Image
番茄酱 和法国红酒是这道菜的功臣!酸酸甜甜、酒香纯正、肉嫩汁浓的牛尾巴! 牛尾一根,泡冷水去血三到四个小时,中间换血水数次; 牛尾焯水,取出晾干待用; 洋葱两个切块,西红柿两个切块; 大炒锅烧热,放少许油,下洋葱炒香,然后下西红柿翻炒片刻; 加入番茄酱(Ketchup),再翻炒片刻,下焯好的牛尾翻炒,加红葡萄酒一大杯,糖、盐、老抽适量; 加水没过牛尾,大火煮开,然后转为小火炖3个小时,至肉骨能轻易分离。或者放入高压锅,煮35分钟,自然降压。 重点是多放红酒,放到心疼为止!;)

White Chocolate Chip Cookies

Image
The little dome shaped white chocolate chip cookies are quite hard to resist!  This recipe yields about 40 cookies. Preheat oven to 375 degree Fahrenheit. 3/4 cup butter, softened 1/2 cup brown sugar 1/4 cup granulated sugar 2 eggs 2 tsp vanilla In a large bowl, beat butter and sugars; Add eggs one at a time, beat until light and fluffy; Add vanilla and mix well. 2 1/4 cup flour 1 tsp baking soda 200g white chocolate chips In a small bowl, mix baking soda with flour; Stir the flour mix into the large bowl until well blended; Stir in white chocolate chips; Line a large baking sheet, or 2 regular ones, with parchment paper; Using a 4cm diameter (small) ice cream scoop to drop the cookie dough, level it with a knife, so you will get perfectly uniformed little doomed round cookies; Bake 10-12 mins. Let it cool for 3 mins, then transfer to wire rack to cool completely. I usually get the white chocolate chips from Bulk Barn, theirs seem le

Upgrade to Windows 10

Image
Upgrade is never a trivial thing. The goal is to provide a seamless experience for all users. The new release has some awesome functionalities to offer, often revolutionary. Most users are expecting things are backwards compatible, everything they are using now should work without a problem after upgrade. Don't assume people are all coming from the previous release. Some could come from the dinosaur age! ;) And you still need to support them. Understanding the challenges, I do expect a few bumps after the upgrade. Here are the issues I have encountered while upgrading my PC from Windows 7 to Windows 10. I appreciate the guys shared their solutions and made my life a lot easier. Hope this will be helpful for someone too. Windows Remote Desktop is not working This is the tool enabled me working from home. It cannot fail, must work! After upgrade, I can connect using remote desktop, but it crashes several seconds right after. I disabled the Audio setting as described in

川味烧排骨

Image
郫县豆瓣是个宝!;) 排骨过水,沥干; 郫县豆瓣切碎,姜切粒;烧开水; 起油锅,排骨炒至金黄; 加豆瓣、姜粒、料酒炒匀; 加开水没过排骨,烧开,加大料和花椒;加盖转小火烧20分钟左右,收汁起锅。

Tissue Holder

Image
If you are like me, regularly carries tissue in your handbag and don't want to buy the expensive pocket tissue packs, you would love to know how to quickly sew your very own tissue holder in less than 10 minutes! You can use the regular facial tissue that comes in a box. You can wash your tissue holder too. Cut 2 pieces of scrapes, top measure 5 1/2 x 7 inch, and lining measures 5 1/2 x 8 inches; Right side together and aligh the short ends, sew at 1/4 inch from the edge; Turn right side out and press, centered; Fold to center, pin and sew at 1/4 inch from the edge at the top and bottom, reinforce your stitches when in the middle; Trim cornors and turn right side out; This tissue holder can hold about 8 tri-fold regular tissue. I like it so much, and in no time, I sewed my second one! ;)

Camping Checklists

Image
It is like taking a mini home with you when going camping! Try to civilize a couple of days staying in nature with all the comfort from home. ;) A great way to drag the kids, adults too, off all sorts of screens, cut off the signals, disconnect completely!  Let's go back to basics.  Stay Tents Tarps Air mattress Air Pump Sleeping bags Pillows Extra blanket Camping chairs Lantern Flashlight, headlights Lighter for camp fire Long clothes line and clothes pins Several grocery bags for garbage Facecloth, toothbrush, toothpaste, tumbler, soap Waterproof sandals, hiking shoes, socks Clothes (Light, long sleeve tops, pants, T-shirts and shorts, PJ's, light jackets) Mosquito candles Eat Hotpot stove and fuel Dutch pot  Frying pan with cover Bowls, plates, cups Kitchen stuff (forks, spoons, chopsticks, cutting board, knife, drainer, sponge, dish washing detergent) Picnic table cloth Cooler and ice packs Food (water, cooked rice, oatmeal, cooking

How to remove the "Showing posts with label ..." box

Image
When you click a label link on a blog, a box appears at the top of your pages, "Showing posts with label ...". It looks weird and you might want to get rid of it, like me. From your blog design view, click "Template", then click the "Edit HTML" button; Ctrl-F to find this line: < b:includable id='status-message'> , click the little triangle on the left to expand the HTML; I commented out the <div> contents (in brown) and replaced it with an empty <div> tag; Save template.  That is all you need to do! If you miss the message box, you can always get it back by uncomment the HTML code. I will not miss it. 

How to group your posts on a single blog

Image
When you have multiple posts of different interests in a single blog, you would want to organize them somehow. So far I have only found one way of doing it, using labels. First, tag your posts with different labels. From your blog design view, click Posts; Select the posts you want to group together by ticking their check boxes; On the header of the posts table, the first drop down menu has a tag symbol, that is used to create and label selected posts. Click it, then create a new label. Once you hit OK, you selected posts will be tagged with that label, which appears besides your post title. Secondly, show the posts grouped by label on your blog. From your blog design view, click Layout; Decide where you want your labels to appear. I chose sidebar-right-1. Click "Add a Widget". A widget selector window pops, scroll down to select Labels. Click the plus sign to specify the details of the labels, like giving it a name. I called mine "Interest

How to delete a blog on Blogger

This one may sounds trivial, "how hard could it be to delete a blog?", but it is not. I was expecting it appear on the "My Blog" page, beside each of the blogs, be a delete button or a drop down menu item ~ maybe a developer from Blogger will see this and make it logically happen ;) . To delete a blog: Go to "My blogs", where all your blogs are listed in the design view.  Click the blog name, then click Settings -> Other -> Delete blog. Deeply hidden, isn't it? ;)

How to merge multiple blogs into one on Blogger

I started this hobby by creating one blog for each of my interest areas: one for delicious pastries, one for life's little moments, and one for the dance class that I am leading. As time goes by, I found myself spending time and energy going back and forth among my blogs, both time consuming and energy sucking. Can I put them in one place? Oh, yea! A simple procedure does it. Go to "My blogs", where all your blogs are listed in the design view.  Decide which one is your main blog, that you want to merge others into. Repeat step 3 for each of the blogs.  Click the blog name, then click Settings -> Other -> Export blog. This saves an xml file on your computer hard drive.  Click your main blog name, then click Settings -> Other -> Import blog, uncheck "Automatically publish all imported posts and pages". It is a good practice to preview all changes before publishing them. Repeat this step for each of the blogs you have exported. If all your

Red Bean Paste Bun

Image
The aroma of homemade red bean paste is irresistible when you bite into the bun! Ingredients 3½ Cups All-Purpose Flour 2½ Cups Red Bean Paste ⅔ Cup Water ⅔ Cup Milk ¼ Cup Sugar ¼ Cup Butter, Melted and Cooled 1½ tsp Fast Active Dry Yeast 1½ tsp Salt Egg wash for brushing Some nuts or seeds to garnish Directions 1. Microwave water and milk together for 40 seconds, about 30 degree. 2. Pour it into bread machine, then add yeast, sugar, butter, flour, salt. Mix all ingredients in the bread machine in dough setting (usually done in 90 minutes). 3. Divide the dough into 20 pieces and make buns. 4. Place the dough on a cooking sheet and set it aside to rise again for about 15 minutes.  5. While buns are rising, preheat the oven to 350°F.  6. Brush the surface of the bread with egg wash and garnish with nuts or seeds just before baking. 7. Bake the buns for about 28~30 minutes, or until golden brown. You can use store bought red bean

发面

Image
从小吃着长大的东西,就是有种特别的味道,让人偏爱。喜欢面食的南方人,终于在失败了无数次后,成功的做了馒头。没有缩水,没有死面。 ;) 1100g 面粉 500ml 水 2 tsp 白糖 1 1/4 tsp Active Dry Yeast 1. 微波炉热水,35秒,至30度水温,搅拌均匀; 加入糖和发酵粉,再搅拌均匀,放置5分钟。 2. 将水慢慢倒入面粉中,边用筷子搅拌成大块大块的面疙瘩。开始揉面,揉成一团后加盖休息10分钟,再揉至面团表面光滑。 3. 用凉水将手打湿,轻轻拍湿面团表面和盆内周,这样面涨起来后表面不会干燥起壳。 4. 发酵到2-3倍大小,将面团排气取出,分成两份,每份打平,沿长边卷起来,轻揉成一条光滑的面滚子,切成10个,一共20个馒头。 5. 放进蒸锅,再次发酵,20分钟。 6. 凉水开始蒸,水开后15分钟。火逐渐关小,熄火后5分钟起锅。 开笼的馒头,好吃到没天理!!! ;)

Blueberry Cake

Image
When blueberries are in season, I love to make this simple cake.  Its cinnamon crust top is so yummy! INGREDIENTS: 1/2 cup sugar 1/4 cup butter 1 egg 1/2 cup milk 2 cup all-purpose flour 2 tsp baking powder 1/2 tsp salt 2 cup fresh blueberries Topping: 1/4 cup sugar 1/3 cup all-purpose flour 1/2 tsp ground cinnamon 1/4 cup butter DIRECTIONS: Preheat oven to 375 degree. Line a 9x9 inch pan with parchment paper or foil; In a large bowl, cream sugar, butter, and egg together; In a small bowl, mix flour, baking powder, and salt.  Stir the dry ingredients into the large bowl, alternating with milk; Stir in blueberries; Add batter to pan. It is very sticky, use a spatula to spread the batter evenly; Combine the ingredients of topping in the small bowl, cut butter into the flour mixtures using a pastry cutter or 2 knives. Sprinkle the topping over batter. Bake in the middle rack for 35 minutes until the top turns lightly golden.  Let it cool on a w

Crazy about buttons

Image
I scored a little white dress from Gap on my summer vacation. It is 100% cotton seersucker with 100% cotton lining. Natural materials are like magnets to me. Its classic style fits me as well. I see it as a canvas, waiting for me to decorate it any way I would like. So here goes the touch up. All I need to do is to sew some buttons! ;)

Black Forest Cake

Image
The classic Black Forest Cake INGREDIENTS: 2 1/8 cups all-purpose flour 1 cup sugar 1/3 cup cocoa powder 1 1/2 tsp baking powder 3/4 tsp baking soda 3/4 tsp salt 3 eggs 1 cup milk 1/2 cup vegetable oil 2 tsp vanilla extract 2 (20 ounce) cans pitted sour cherries 1/4 cup sugar 1/4 cup cornstarch 1/2 tsp vanilla extract 3 cups heavy whipping cream 1/4 cup confectioners' sugar DIRECTIONS: Preheat oven to 350 degrees F (175 degrees C). Grease and flour two 8 inch round cake pan; cover bottoms with wax paper.  In a large bowl, combine flour, sugar, cocoa, baking powder, baking soda and salt. Add eggs, milk, oil, and vanillar; beat until well blended. Pour batter into prepared pans. Bake for 35 mins, or until wooden toothpick inserted in centers comes out clean. Cool in pans on wire rack for 10 mins. Loosen egdges, and remove to racks to cool completely. Drain cherries, reserving 1/2 juice. Combine reserved juice, cherries, sugar and cornstar